
I decided to take on a classic recipe… Beer Can Chicken. This is a great way to cook chicken to make it flavorful and tender. If you want taste in every bite and juices galore, follow along for my version of Beer Can Chicken on the Goldens’ Cast Iron Cooker.
Beer Can Chicken on the Goldens' Cast Iron Cooker | Heath Riles BBQ
In my opinion, the most important thing about making this chicken right is knowing how to cook it. The seasonings and type of beer you use are secondary. I’m walking you through my way of doing it today. I hope you like it!
The Ingredients
Whole chicken. This recipe requires the entire bird.
Chicken stock. Adds flavor and moisture to the meat.
Heath Riles BBQ Chicken Injection and Brine. I specifically formulated this to add to the taste of any chicken dish you might want to cook.
Duck Fat Spray. Works great as a binder for the seasonings.
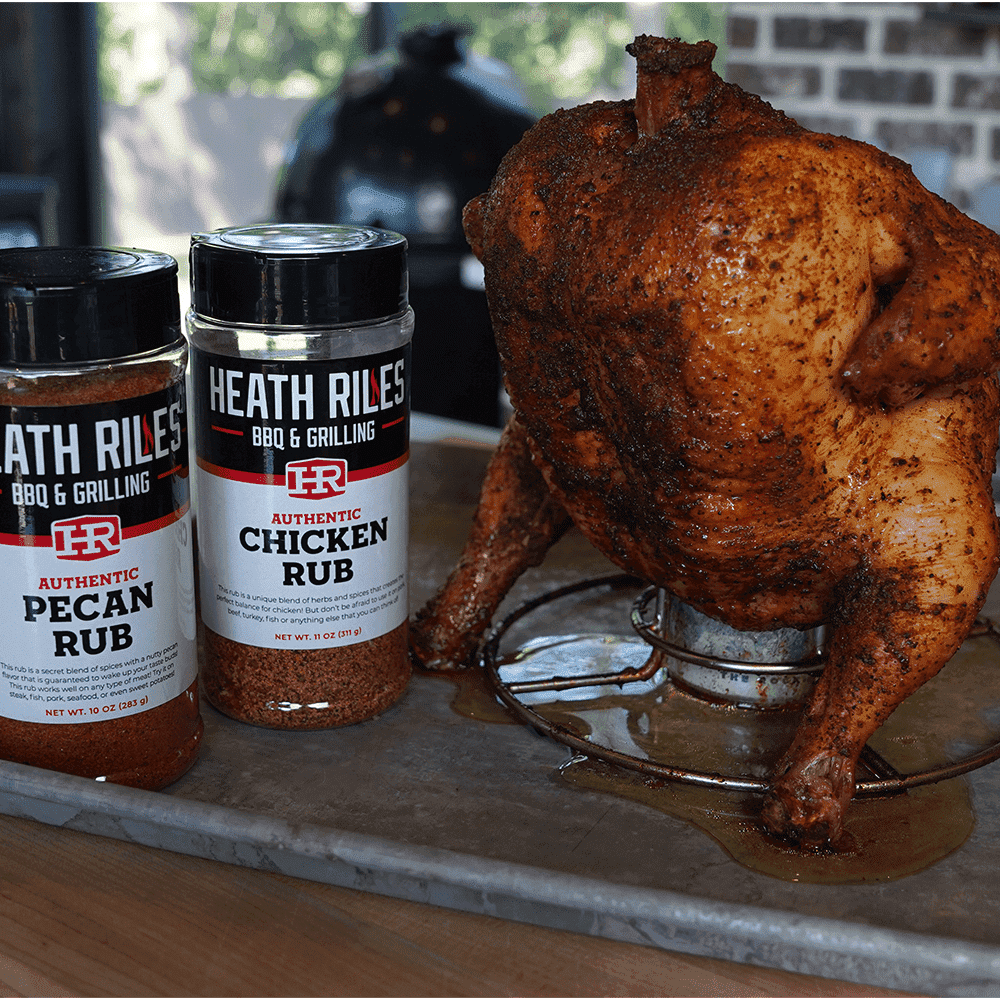
Heath Riles BBQ Chicken Rub. A wonderful combination of herbs and spices made especially for poultry plates.
Heath Riles BBQ Pecan Rub. A little bit savory and a little bit sweet, this rub is all the rage for meat flavoring.
Can of Coors Light. After all, it’s named Beer Can Chicken.
The Equipment Setup
I preheated my Goldens’ Cast Iron Cooker to between 250-275 degrees F using Royal Oak Lump Charcoal and Tumbleweeds.
The Process for Making Beer Can Chicken
If you’d rather watch a step-by-step video than read a recipe, head over to my Youtube channel and watch me make my Beer Can Chicken.
- Unpack the chicken. I cut my bird out of the package and placed it on an aluminum pan, making sure it was all cleaned out.
- Mix the injection. Starting with a container of chicken stock, I added my Chicken Injection and Brine and mixed it together until it dissolved.
- Inject the bird. Getting as much liquid as I could into the syringe, I started injecting the chicken at different areas. I love the way injections add moisture and flavor to the meat during the cooking process.
- Season it up. First I sprayed it good with Duck Fat Spray to create a binder. Then I sprinkled the entire bird with my Chicken Rub. Its blend of herbs and spices will really add flavor to this chicken. I topped it off with a coat of my Pecan Rub to give it a sweet, slightly nutty taste.
- Add the beer. A can of Coors Light fit the bill, but you can use any type of beer for this recipe. I positioned the chicken end on the beer can (held by a wire foundation).
- Get grilling. My Goldens’ Cast Iron Cooker was running about 285 degrees F when I put my chicken on. I set my bird beer-end-side-down right on the grill. I tucked the wings in, set the alarm for 163 degrees F, put it in the chicken’s breast, and shut the lid.
- Pull it off and let it rest. It took an hour and 40 minutes to cook this chicken. Once it hit an internal temp of 163 degrees F, I pulled it off the grill and let it rest for about 20 minutes.
- Remove the can and cut it up. I carefully removed the beer can, using a sharp knife, carved the bird up.
The Results
Damn! The chicken was a beautiful color and, when I cut into it, juices dripped out. I knew it was going to be absolutely delicious, and it didn’t disappoint. It was melt-in-your-mouth tender and so juicy and flavorful I just about couldn’t stand it. Wow, this bird turned out so delicious!
Serving Suggestions for Beer Can Chicken
You can cut a few slices per person that add up to between 4-8 ounces, depending on how hungry your crew is. It makes a great meal with mashed potatoes, green beans, and corn.
Storing Leftovers
Put the leftovers in an airtight container and store them in the fridge for up to 3 days. This chicken does well reheated, or use it cold to make sandwiches.
Equipment and Tools
Goldens’ Cast Iron Cooker, Royal Oak Lump Charcoal , Royal Oak Tumbleweeds , Heath Riles BBQ Mixing Shaker Bottle, ChefAlarm, Beer Can Chicken Holder, Meat Injector Syringe, Black Latex Gloves , Stone + Wood Cutting Boards


