Every brisket tells a story, and this one starts at Primo’s Butcher Shop in Hernando, Mississippi. If you’ve been around good barbecue joints in Texas or the Southeast, you’ve likely heard of Creekstone Farms Prime Brisket. They’re known for consistently producing high-quality beef, and when you score a 16-pounder, you know you’ve got something special to work with.
This brisket came straight from Primo’s—a newer butcher shop that’s quickly built a reputation for excellent cuts and top-notch service. When I called ahead and asked about prime brisket, they told me, “I’ve got one left. I’ll put your name on it.” That’s the kind of service that makes a pitmaster’s day.
How to Trim a Brisket with a Large Fat Vein | Heath Riles BBQ
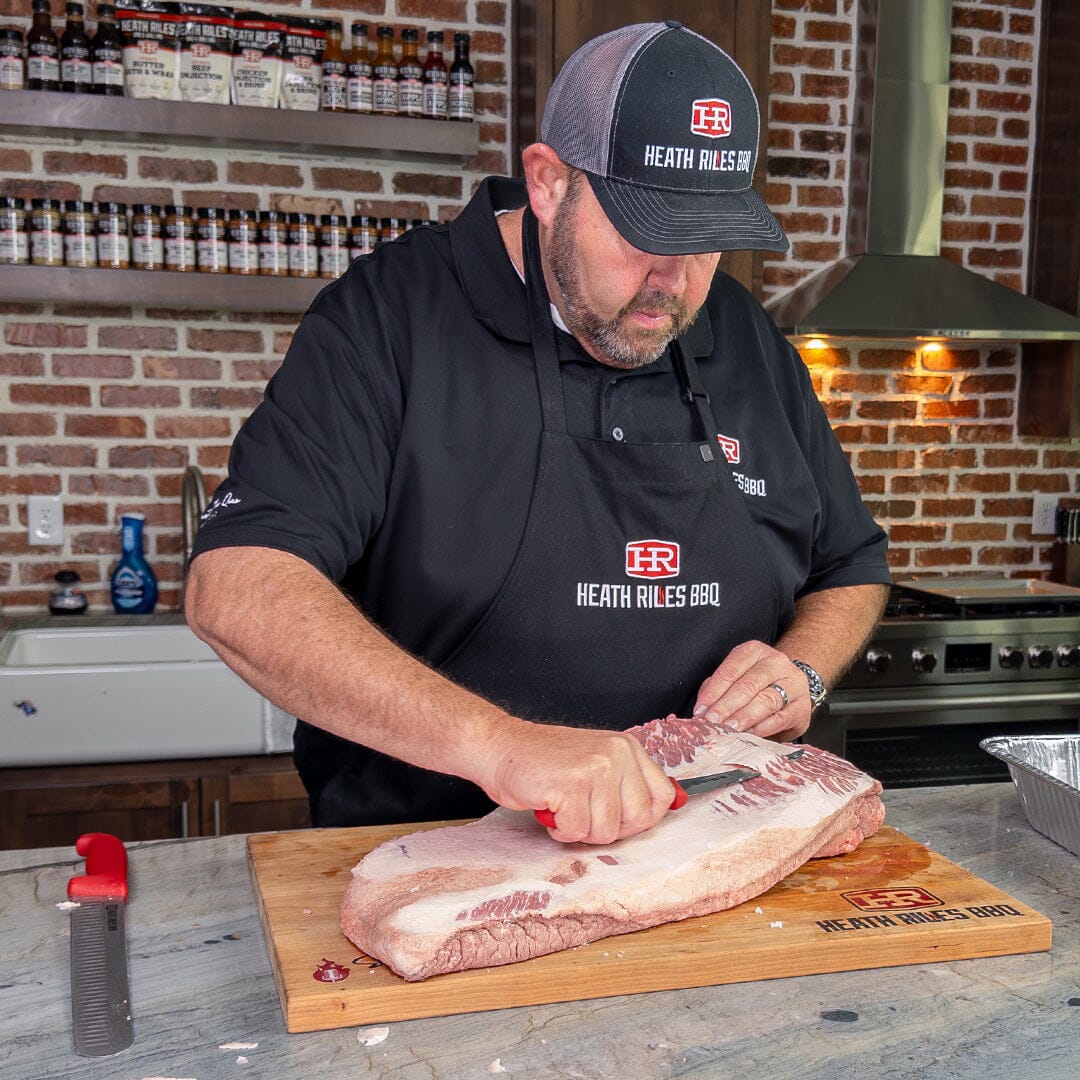
The beauty of barbecue is that sometimes you get a perfect brisket, and sometimes you don’t. This particular cut had a massive fat seam running through it, which meant I needed to approach trimming a little differently than usual. Here’s how I tackled it, step by step.
Why Trimming Matters
Before we jump into the process, let’s talk about why trimming is so important. Brisket has two main muscles—the flat and the point—connected by a thick seam of fat. Some of that fat will render during a long smoke, but large, dense seams never fully melt away. If you don’t trim them out, you’ll be left with chewy bites and uneven cooking.
Trimming also:
- Exposes more surface area for seasoning (which means better bark).
- Helps the brisket cook more evenly.
- Makes slicing and serving easier.
So yes, it takes time, but the payoff is worth it.
Step-by-Step: How to Tackle a Brisket with a Large Fat Vein
1. Get Set Up
- Start with a cutting board or pan—something to catch any liquid from the package.
- Have both a large slicer and a boning knife ready. You’ll use both depending on the cut.
- Always trim away from yourself—it’s safer, even if sometimes easier said than done.
2. Inspect the Brisket
Lay the brisket flat and get a feel for it. You’ll notice the flat is thinner and wider, while the point is thicker and marbled. In this brisket, the fat seam was running deep between the two muscles, so I knew I’d need to dig in.
3. Start with the Back Side
I like beginning on the back side of the brisket. This gives you a better sense of how the point runs and lets you expose more surface for bark. Hold the brisket up slightly as you work, so you can trim fat without digging too deeply into the meat.
4. Work the Fat Cap
There’s usually a thick layer of fat across the top. You don’t want to remove it all—some fat is protective and keeps the flat moist. Instead, aim for an even layer, about a ¼ inch thick.
5. Dig Into the Fat Seam
This is where patience comes in. With a brisket like this one, that seam of fat was so thick that leaving it intact would’ve meant an under-rendered, greasy final product. So I carefully started carving wedges of fat out.
The key is to:
- Cut small sections at a time.
- Follow the natural line between the muscles.
- Stop once the brisket can “lay flat.” That means you’ve removed enough fat for even cooking without cutting away all the protection.
6. Square and Shape
Once the big trimming is done, go back and square the edges. Round off corners that might burn, and clean up any stray flaps of fat or thin meat that won’t cook well. Think of it like shaping the brisket for the smoke.
The Finished Trim
By the end, this 16-pounder looked closer to 12–13 pounds, but it was much better prepared for the pit. The point was exposed enough for bark to develop, the flat had a protective fat layer, and the fat seam was carved down so it would render properly.
Was it the prettiest brisket I’ve ever trimmed? No. But barbecue isn’t always about perfection—it’s about turning what you have into something worth eating. Once smoked, sliced, and seasoned, this brisket will still be a crowd-pleaser.
Serving Suggestions
A properly trimmed brisket like this is versatile:
- Slice the flat for classic barbecue plates.
- Chop or cube the point for burnt ends or sandwiches.
- Save trimmed fat to make beef tallow—perfect for basting or adding richness to other cooks.
Pair brisket with pickles, onions, and white bread for that Texas feel, or go Southern with coleslaw, baked beans, and cornbread.
Storage Tips
- Refrigerator: Store leftovers in an airtight container for up to 4 days.
- Freezer: Slice and vacuum-seal portions in freezer bags for up to 3 months.
- Reheat: Add a splash of beef broth, wrap in foil, and warm gently in the oven to keep it moist.
Final Thoughts
Every brisket is a little different, and sometimes you get a tricky one with a massive fat vein. Don’t let that discourage you. With a sharp knife, some patience, and the right approach, you can transform even a challenging cut into something spectacular.
At the end of the day, it’s not about having a competition-perfect brisket—it’s about creating great barbecue worth sharing. This Creekstone Prime, once trimmed and smoked, is exactly that.
Gear You’ll Need
Large slicer, Boning knife, Cutting board, Gloves, Freezer bags

