If you’ve been following my recipes for a while, you’ll notice that many of them use two-zone grilling. This cooking method is perfect for grilling steak, chicken, and more! When you create a two-zone fire, you amplify your level of control, even when using a charcoal grill.
It’s a popular misconception that charcoal grills have a mind of their own. That’s not the case when you create a two-zone fire! In this tutorial, I’ll show you how to create a hot-zone and a cool-zone for creating the best food in the neighborhood.
How to Do Two-Zone Grilling: Heath Riles BBQ
The formal term for “hot-zone” and “cool-zone” is direct and indirect heat. Chances are, you’re using both of these heat sources already, just not simultaneously. Direct heat is great for cooking hot and fast or adding a gorgeous sear to a pork chop or steak. Indirect heat gives you a low and slow taste, keeping the inside of your meat tender.
When you get both heat sources going at the same time, true magic happens!
The Supplies
Charcoal Grill. One of my favorite charcoal grills is the Weber Kettle Grill. If you’re not into fussing with technology, try this grill. Weber produces high-quality pits that last for ages. This model is easy to store, making it perfect for small spaces.
Another great charcoal pit is the PK 360 grill. This cast iron grill is durable and holds heat in all types of weather. It’s a favorite among those who live in extreme climates.
Chimney. A chimney keeps your charcoal in one place, heating it evenly. I love my custom-made chimney from Cotton Gin Smokers. This heavy-duty option lasts years and looks incredible! Another great pick is the Vortex Chimney, a favorite among pitmasters.
Charcoal. My charcoal of choice is always Royal Oak Charcoal. They produce a clean product with no fillers. Their charcoal gives meat and veggies a deep, authentic flavor. Royal Oak’s authenticity is boosted even more by their reasonable pricing. You can purchase their products nearly anywhere these days! One bag lasts a long time because this charcoal burns hot and fast.
Tumbleweeds. If you like Royal Oak Charcoal, you’ll love these firestarters. Royal Oak created these tumbleweeds so pitmasters could have an all-natural firestarter. They contain wood and wax, nothing else! I’ve used them numerous times with success.
How to Do Two-Zone Grilling
You’ll find a visual demonstration of two-zone cooking in many of my videos featuring the Weber Kettle Grill. For now, here’s a quick rundown of how I get things rolling.
- Clean the grill. If my grill is looking extra grimy, I’ll use a grill brush to get any debris off the grates.
- Fill the chimney. Next, I set my chimney in the center of the grill and filled it with Royal Oak Charcoal.
- Add a fire starter. I lit one of Royal Oak Charcoal’s Tumbleweeds near the bottom of the chimney so it could quickly ignite the charcoal.
- Let it sit. The charcoal needs time to heat up, so I let it sit for 15 minutes. The charcoal is ready when it develops a layer of ash and glows red.
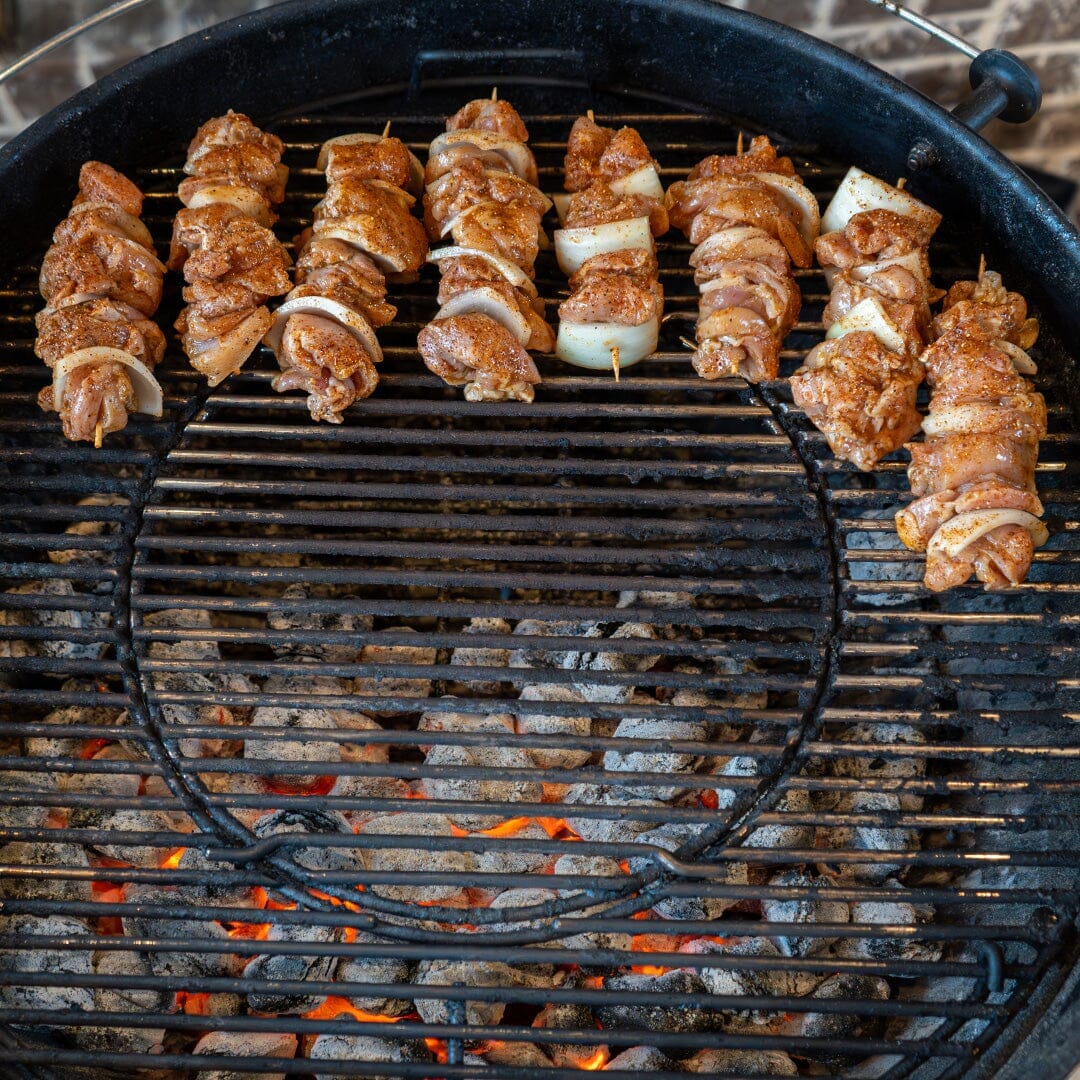
- Distribute the charcoal. Once the charcoal was ready, I poured it all on one side of the Weber Kettle Grill. This creates an extremely hot-zone, a cool-zone, and a middle-of-the-road zone. The only thing left was to shut the lid and let the grates heat up!
Why Two-Zone Grilling?
Why take the time to learn how to do two-zone grilling? The reasons are endless! Here are a few of my favorite benefits.
- Freedom. With two-zone grilling, you aren’t stuck cooking over direct heat. You have the freedom to slow or speed up the cooking process as you wish.
- Time. Sometimes, you need to finish something hot and fast. Two-zone cooking allows you to get food grilled in record time without sacrificing flavor.
- Taste. Many prefer food cooked over charcoal, as it has a rich, authentic flavor. Two-zone grilling allows you to add char to your wings, steaks, and burgers, amping up the taste factor.
- Reverse-searing. If you want to dive into reverse searing, you absolutely NEED a two-zone fire. No other method will give you that perfectly finished steak or prime rib.
My Favorite Recipes for Two-Zone Grilling
Now that you know how to do two-zone grilling, you need some recipes to practice! Here are a few of my favorite suggestions.
- $100 Wagyu Flank Steak Fajitas. If you’re in the mood to treat yourself, you can’t go wrong with a plate of $100 Wagyu Flank Steak Fajitas. They’re seasoned with Heath Riles BBQ Beef Rub and are the most tender Tex-Mex dish around! Add some cilantro and charred tortillas for good measure.
- Herb-Crusted Prime Rib. This prime rib is the perfect addition to any holiday table. It features a gorgeous, herb-infused crust and a juicy, rich inside. Bonus: You’ll have leftovers for sandwiches!
- Hawaiian-Style Burgers. These delicious burgers are packed with tropical flavor! Charred pineapple, succulent beef, and a spicy mayo combine for one mind-blowing experience. This recipe is bound to be a family favorite!
Equipment and Tools
Weber Kettle Grill, Cotton Gin Smokers, Vortex Chimney, Royal Oak Charcoal, Royal Oak Tumbleweeds.

